
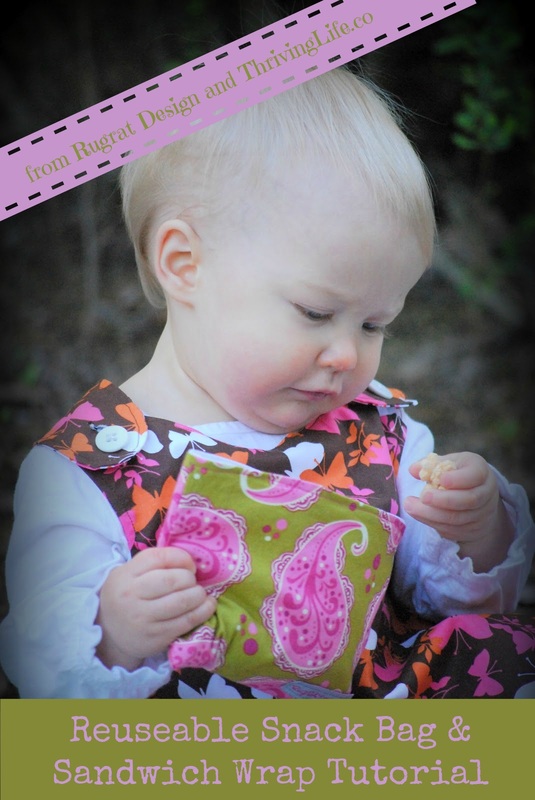
Lesley, our fitness and Etsy expert is back with perhaps the best tutorial I've ever seen. She poured her heart into this one folks, who is going to join me in making a set of these? Granted, I'm lucky enough to have two Rugrat Design snack bags that we use ALL.THE.TIME! Perfect for on the go snacking :)
%20%20hmm...%20which%20will%20I%20choose%3F)
For those of us with school age children….the time has come….summer is over and it is time for back to school. There may have been tears (theirs or your own) or there may have been celebratory moments (again, theirs or maybe your own too!) Regardless of how it happened….it happened….the school supplies were purchased, first day of school outfit selected and laid out, teachers and schedules assigned and just like that- the 2013-2014 school year began. Along with those supplies, book bags, “perfect shoes” and the coolest styles comes the lunchbox. And that is where the subject of this month’s entry begins….
If you’re reading this blog- it means you are at least partially green. If you were looking for the “How to fill the landfill ASAP” blog- you’re in the wrong spot. So- back to that lunchbox. In packing daily lunches for my daughter I was determined to do my part to be a little more green. I went a tad crazy seeking the perfect lunchbox. My daughter is carrying a Goodbyn lunchbox this year and so far I pretty much have a crush on the thing. Truly.
In addition to this lunchbox, we use reusable sandwich wraps and snack bags instead of ziplocs, foil or saran wrap when I pack lunch and snacks. We also use a reusable drink bottle instead of juice boxes. Since I can’t tell you how to make a drink bottle, you’ll just have to go to Target to get one of those bad boys. But, as the woman behind Rugrat Design. I CAN tell you how to make the reusable wraps. So I will do that. That’s right, I’m telling you how to make something instead of sending you to my shop to buy it. Aren’t I nice!? For those of you who don’t sew or don’t want to- then just head right over and do your shopping and I’ll happily make it and mail it to you :)
So, shut up already Lesley and tell me what to do. OK. I hear ya!
With no further ado….THE REUSABLE SNACK BAG AND SANDWICH WRAP TUTORIAL This is my first tutorial and therefore I request your patience as it may be a tad wordy. But I promise you, at the end, you will have a reusable snack bag and sandwich wrap and you can send stylish and green lunches for your Rugrat (or yourself!) Goodbye waste…hello style!
| This tutorial will result in 1 reusable snack bag and 1 reusable sandwich wrap. | 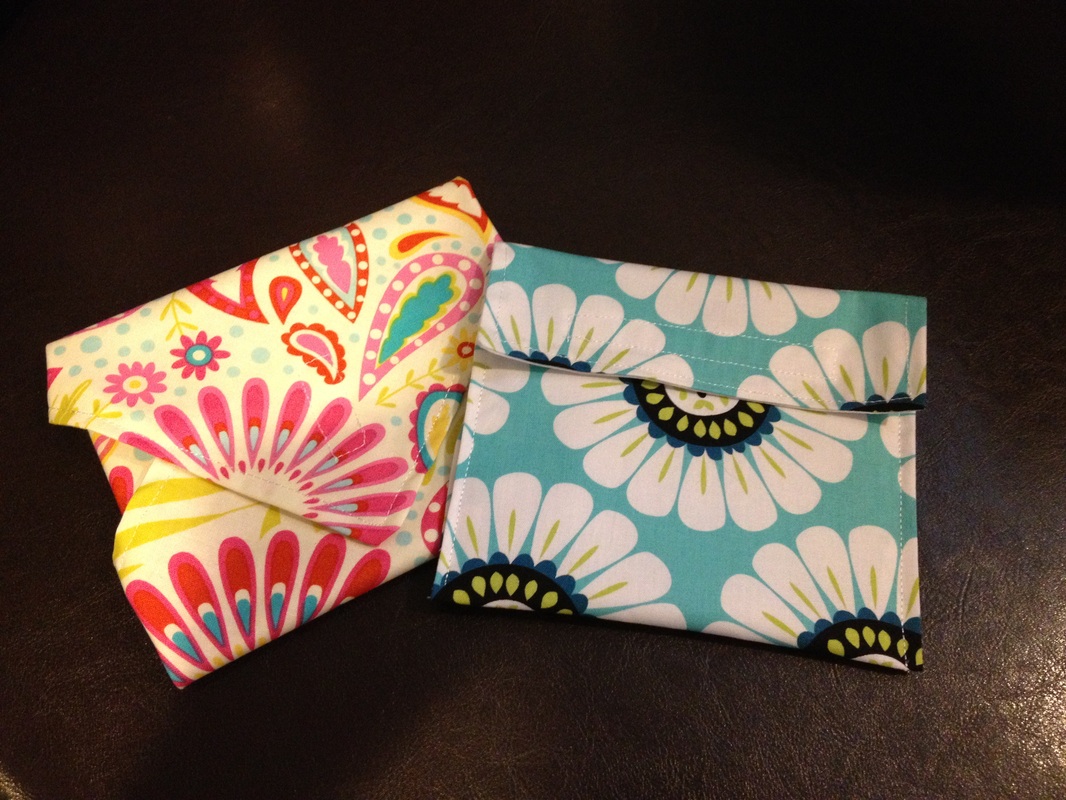 |
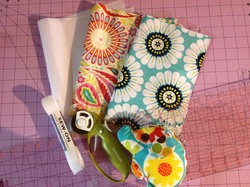
Step One: Gather your supplies.
- Cotton Fabric (enough to cut one 12x12” square and one 8x13” rectangle)
- Ripstop Nylon (sold in the utility fabric section at JoAnn or Hobby Lobby – this is food safe and water resistant so it’s good for items that could become “juicy” like grapes. Waterproof fabrics like PUL or oilcloth are not recommended for food storage.)
- Thread
- 8” of ¾ inch Velcro
- scissors
- Pins
- cutting mat, rotary cutter and ruler (if you have them. If not, fabric scissors work fine!)
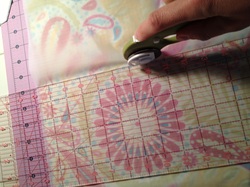
Step 2:
Cut your fabric. You need to cut a 12x12” square from both the cotton and the nylon. I usually just cut them on top of one another using a rotary blade. If you don’t have that- you can trace the measurements onto the fabric and use scissors to cut them.
Cut your fabric. You need to cut a 12x12” square from both the cotton and the nylon. I usually just cut them on top of one another using a rotary blade. If you don’t have that- you can trace the measurements onto the fabric and use scissors to cut them.
Step 3:
Pin the fabric and ripstop together. There is not a right or wrong side to the nylon so you can just pink it to the right side (aka the pretty/printed side of the fabric). You just need enough pins to keep it from slipping as you sew.
Pin the fabric and ripstop together. There is not a right or wrong side to the nylon so you can just pink it to the right side (aka the pretty/printed side of the fabric). You just need enough pins to keep it from slipping as you sew.
Step 4:
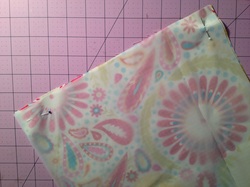
Sew the fabric and nylon together using a 3/8”stitch. Sew all around the edges of the material but leave approximately a 3 inch opening not sewn so you can flip it back to the right sides.
Sew the fabric and nylon together using a 3/8”stitch. Sew all around the edges of the material but leave approximately a 3 inch opening not sewn so you can flip it back to the right sides.
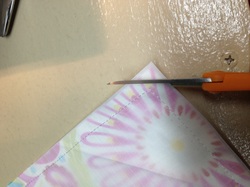
Step 5: Cut the corners off from where you just sewed the fabric and nylon together. Be careful not to cut the stitches. Cutting the corners will help the fabric to lay flat and make a perfect “point” when flipped.
Step 6: Flip the fabric right side out- through that opening you left. Use your fingers to push out the seams flat – or even the top of a pen cap to get the corners out.
Step 6: Flip the fabric right side out- through that opening you left. Use your fingers to push out the seams flat – or even the top of a pen cap to get the corners out.
Step 7:
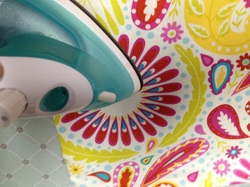
Now that your fabric and nylon are flipped- iron them. Iron them on the FABRIC SIDE (unless you want to melt your nylon onto your iron and get a new one “by mistake.”) Otherwise, I recommend the fabric side for ironing.
Now that your fabric and nylon are flipped- iron them. Iron them on the FABRIC SIDE (unless you want to melt your nylon onto your iron and get a new one “by mistake.”) Otherwise, I recommend the fabric side for ironing.
Step 8:
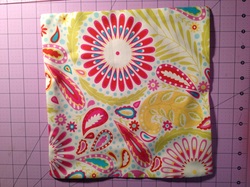
You now have a nice flat square with fabric on one side and nylon on the other. It looks like this.
You now have a nice flat square with fabric on one side and nylon on the other. It looks like this.

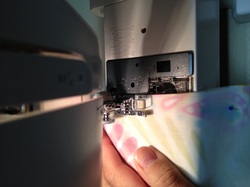
Top stitch the fabric – all the way around (even through the spot that was left open before). I use a ¼” stitch here.
Step 9: You’re going to now stitch on the Velcro. You’re nearly done! (Are you hungry- because you’re about to have a beautiful wrap for that sandwich you’re drooling over!)
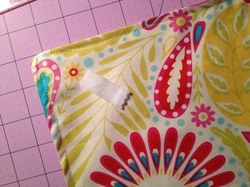
Cut approx. 1” of Velcro. You’re going to sew one side of the Velcro to the fabric side in one of the corners- in a diagonal position.
Cut approx. 1” of Velcro. You’re going to sew one side of the Velcro to the fabric side in one of the corners- in a diagonal position.
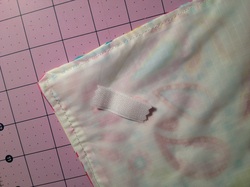
And sew the matching piece of Velcro to the nylon side on the opposite corner of where you sewed the Velcro on the cotton side. I warn you- sewing through the hook side of the Velcro can make your thread break. If you have a nylon thread, that can help. Or, you can sew carefully around the edge of the Velcro which will help to avoid the “hook’ part. Just prepare yourself you may be threading the needle a few times if this happens. It’s not you. It’s just life.
And- TA DA! You’re done! Now you have a sandwich wrap!! To use- put your yummy sandwich or bagel into the wrap with the wrap in a diamond position (so a top corner with Velcro is at the 12 o’clock position.) Fold the two sides without Velcro in, then the bottom, then close with the top and Velcro closed. Boom. Done. Yummy, cute and green.
Now- to the snack bag.
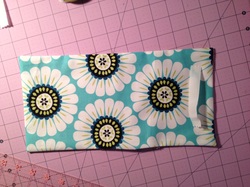
Follow steps 1 (but this time cut an 8x13 piece of fabric and nylon) and follow through step 7 above.
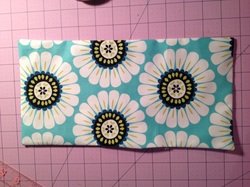
You will have a rectangle like this.
Now- to the snack bag.
Follow steps 1 (but this time cut an 8x13 piece of fabric and nylon) and follow through step 7 above.
You will have a rectangle like this.
Step 8:
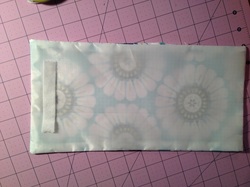
You will now sew the Velcro on this. You want to cut about a 6” piece of Velcro. Sew one side of the Velcro to the fabric side on one of the short ends.
You will now sew the Velcro on this. You want to cut about a 6” piece of Velcro. Sew one side of the Velcro to the fabric side on one of the short ends.
and the matching part of the Velcro should be sewn on the other short end but on the nylon side like this
Step 9:
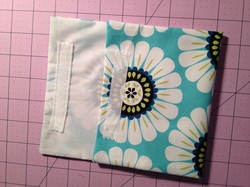
Fold the snack bag so the Velcro on the fabric side folds up and “looks” at you. It should look like this. When you fold it- you want to fold it up to a point that the top flap (where the Velcro on the nylon shows) can fold over and attach to the matching Velcro. If it does – you’re in business. Take your newly folded piece over to the sewing machine (you can pin it if you want to help hold it- nylon can be slippery. )
Fold the snack bag so the Velcro on the fabric side folds up and “looks” at you. It should look like this. When you fold it- you want to fold it up to a point that the top flap (where the Velcro on the nylon shows) can fold over and attach to the matching Velcro. If it does – you’re in business. Take your newly folded piece over to the sewing machine (you can pin it if you want to help hold it- nylon can be slippery. )
Step 10:
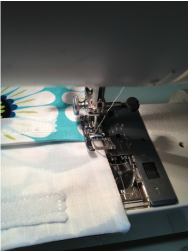
Starting at the bottom left corner, top stitch (remember to “lock” your stitch when you start) from the bottom left corner up and around the top of the bag top and down to the bottom right corner (lock the stitch there too.) I usually do a little lock stitch at the part where the bag “opening” is (as shown) for extra reinforcement.
Now- you’re DONE!
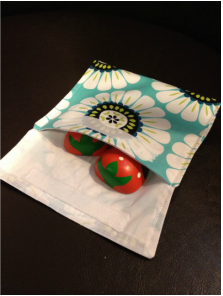
A Side Note: I recommend washing these in a delicate bag (in your washing machine) and then lying flat to dry. Do not use fabric softener when you wash them unless you are fond of the taste of lavender or whatever scent your softener is. The bags are great for dry snacks like crackers, granola, cereal, etc. as well as those that can be damp- carrots, grapes, veggies.
Enjoy! And if you haven’t already done so, be sure to like the Rugrat Design facebook page! I’d love to see what you’ve made!
Love,
Lesley, FEE
Enjoy! And if you haven’t already done so, be sure to like the Rugrat Design facebook page! I’d love to see what you’ve made!
Love,
Lesley, FEE

 RSS Feed

