• THRIVE Life
  • Lazy Green Mama
  • About

How to cheat when overnight camping or hiking

8/2/2014

0 Comments

 
Picture
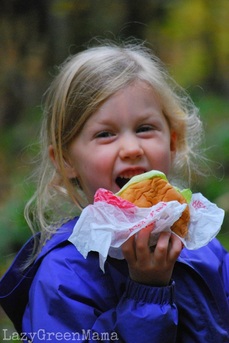
Many moons ago, Jake and I stumbled upon a brilliant CHEAT when it comes to overnight backpacking or day hikes...  


FAST FOOD! 

Not what you expected, was it?  We came up with the idea one winter day when we planned to drive into the mountains of Oregon immediately after work and hike (on 6 feet of snow) to a shelter for one overnight.  We didn't want to have to prep food and cook it once we got to the shelter, so we swung by a burger joint, wrapped the burgers in our clothes to keep them warm (ish) and were quite pleased with ourselves when we got to the shelter and were able to dig in without any more effort!

Now, we use this same CHEAT sometimes for family day hikes!  This picture was taken on an afternoon hike when we rushed home from church, changed our clothes and headed back out.  If we had paused to prep food, our hike would have been majorly delayed.  Plus, since it is a rare treat, it adds to the fun of the trip for us!

What's your favorite hiking/camping cheat?

Picture
0 Comments

Declared "THE BEST SALAD DRESSING" ::  Cranberry Vinaigrette

11/10/2013

0 Comments

 
Picture
When we want to be fancy, our go-to cookbook is:  Pacific Northwest:  The Beautiful Cookbook, edited by Kathy Casey.  I don't recall where or when we received it, but we did live in the Pacific NW for about 2 delicious years and leafing through this cookbook not only brings back wonderful culinary adventures, but many fond memories of meals shared with friends.

If we've had this cookbook out while cooking for you, you should know that we think incredibly highly of you and want to entertain to the best of our abilities.  This is not a cookbook for the faint of heart, or for woman who claim to be {lazy}.  Nope, this cookbook is full of complex recipes that take commitment and time and consistently produce amazing results.

You may have already guessed that this is my HUSBAND's COOKBOOK.  I never ever feel inspired enough to use it.  HOWEVER, last week while he was making the spicy squash bisque with root vegetables (which he served in small hollowed out pumpkins...and grew 90% of the ingredients himself), I followed their suggestion to serve this dish with a salad topped with spicy walnuts, apples & cranberry vinaigrette.

LET IT BE SAID...this might very well be the ONLY dressing that will pass my lips from hence forth.

Picture
Cranberry Vinaigrette
adapted from Pacific Northwest The Beautiful Cookbook (see affiliate link -->)

Ingredients:
2/3 c fresh, frozen or freeze dried cranberries
1/4 c sugar
1/2 cup apple cider vinegar
1 tsp Dijon mustard
1/4 c fresh orange juice
1/2 c vegetable oil
1/4 tsp salt
fresh ground pepper to taste

Directions:
If using freeze dried cranberries, crush the berries into a powder using your hand or by placing them in a bag and rolling with a rolling pin.

Place the cranberries, sugar and vinegar in a small saucepan and cook over medium heat until sugar is dissolved and mixture is warm (or 4-5 minutes if using fresh cranberries, till they pop.  Once mixture cools, puree in blender until smooth).  

Pour the puree into a medium bowl and whisk in the mustard, orange juice and vegetable oil.  Season with salt and peppers.  Refrigerate until needed.

Picture
Will this dressing make it to your Thanksgiving table this year?  
What is your FAVORITE Thanksgiving (or fancy dinner party) food?

Buy Cranberries
Picture
the squash bisque soup in pumpkin bowl! YUM!
0 Comments

Patriotic Chocolate Covered Strawberries

8/31/2013

0 Comments

 
Author's note:  Like the Strawberry Granita, this post was meant to be published during June or July... do to family circumstances, that didn't happen.  However, it's still a great idea for any upcoming picnics and/or "Pin" or bookmark this idea for next year :)
Picture
Is there anything better than a fresh strawberry?  How about a chocolate covered strawberry?  How about a red, white & blue strawberry?  Oh my... I think we all need to eat a batch of these right NOW!

Guaranteed to deliver the “WOW” factor at any patriotic gathering and shh... don’t tell, but this is the easiest dessert you’ll ever make!

Ingredients:
  • A pound fresh or freeze dried of strawberries (about 24)
  • 16 ounces of white chocolate
  • 2 Tablespoons of shortening
  • ¼ cup of blue sugar crystals
  • wax paper


Picture
DIRECTIONS:

1. Wash strawberries, leaving the leaves in place.  Lay the strawberries in a single layer on paper towels. 
*Chocolate will NOT stick to strawberries if there is any moisture on the berry!
**If using freeze dried whole berries, do not wash first!  These are DELICIOUS crunchy treats!
2. Place the chocolates in a microwaveable bowl that will not get too hot to touch 
    a. Put microwave on 50% power (if your microwave doesn’t have a low power                 setting, check and stir your chocolate more frequently)
    b. Microwave chocolate in 30-60 minute increments, stirring and rotating the bowl           between each session.  
     c. Finish heating the chocolate when just a small amount of chocolate chunks remain (typically between 3-4                   minutes).  Stir chocolate until uniformly melted and smooth.
3. Holding strawberries by the stem, dip the strawberries into the chocolate until at least ¾ of the strawberry is covered in chocolate.
4. Immediately dip into the blue sugar crystals
5. Lay on wax paper and leave until the chocolate hardens
*It’s not ideal to refrigerate chocolate covered strawberries as moisture gathers on top of the chocolate.  If possible, make this dessert right before your party and/or leave them in a cool place in the house until ready to eat (I actually put the tray in my air conditioned bedroom for a few hours!).  
6. Put on a plate or serving tray and ENJOY :)

This dessert was inspired by this picture:  http://allrecipes.com/Cook/Photo.aspx?photoID=428300


Buy Freeze Dried Strawberries
What will you be doing this Labor Day Weekend?

Bon Appetit,
Picture
0 Comments

THE REUSABLE SNACK BAG AND SANDWICH WRAP TUTORIAL

8/28/2013

2 Comments

 
Lesley, our fitness and Etsy expert is back with perhaps the best tutorial I've ever seen.  She poured her heart into this one folks, who is going to join me in making a set of these?  Granted, I'm lucky enough to have two Rugrat Design snack bags that we use ALL.THE.TIME!  Perfect for on the go snacking :)
Picture
__ For those of us with school age children….the time has come….summer is over and it is time for back to school. There may have been tears (theirs or your own) or there may have been celebratory moments (again, theirs or maybe your own too!) Regardless of how it happened….it happened….the school supplies were purchased, first day of school outfit selected and laid out, teachers and schedules assigned and just like that- the 2013-2014 school year began. Along with those supplies, book bags, “perfect shoes” and the coolest styles comes the lunchbox. And that is where the subject of this month’s entry begins….

If you’re reading this blog- it means you are at least partially green. If you were looking for the “How to fill the landfill ASAP” blog- you’re in the wrong spot. So- back to that lunchbox. In packing daily lunches for my daughter I was determined to do my part to be a little more green. I went a tad crazy seeking the perfect lunchbox.  My daughter is carrying a Goodbyn lunchbox this year and so far I pretty much have a crush on the thing. Truly.

In addition to this lunchbox, we use reusable sandwich wraps and snack bags instead of ziplocs, foil or saran wrap when I pack lunch and snacks. We also use a reusable drink bottle instead of juice boxes. Since I can’t tell you how to make a drink bottle, you’ll just have to go to Target to get one of those bad boys. But, as the woman behind Rugrat Design. I CAN tell you how to make the reusable wraps. So I will do that. That’s right, I’m telling you how to make something instead of sending you to my shop to buy it. Aren’t I nice!? For those of you who don’t sew or don’t want to- then just head right over and do your shopping and I’ll happily make it and mail it to you :)

So, shut up already Lesley and tell me what to do. OK. I hear ya!

With no further ado….THE REUSABLE SNACK BAG AND SANDWICH WRAP TUTORIAL This is my first tutorial and therefore I request your patience as it may be a tad wordy. But I promise you, at the end, you will have a reusable snack bag and sandwich wrap and you can send stylish and green lunches for your Rugrat (or yourself!) Goodbye waste…hello style!


_This tutorial will result in 1 reusable snack bag and 1 reusable sandwich wrap.
Click here to shop Goodbyn lunchboxes
Picture

Read More
2 Comments

Back to School Special :: Quick & Healthy Meal Plan

8/26/2013

1 Comment

 
Picture
It's that time of year... dun dun DUN!  This time of year brings so many feelings:  excitement for new things, sadness for losing free time, wonder over the enormous changes my kids will grow into, and STRESS over HOW WILL I MANAGE TO CLEAN THE HOUSE, DO LAUNDRY, FEED MY FAMILY AND WORK!

Do you hear me on that?  Can I get a "HECK YEAH?"

Fortunately, I have some secret weapons... and (spoiler alert), it's all freeze dried!


Quick and easy breakfast:
Scrambled egg mix with freeze dried sausage crumbles, freeze dried spinach.

Midmorning snack:
Strawberry yogurt bites

Lunch:
Chicken Salad on crackers & dried fruit (I'm craving fuji apples and peach slices)

TO MAKE (this makes A LOT... I often halve or quarter it):
2.5 cup freeze dried chopped chicken
1/2 cup freeze dried chopped onion
3/4 cup freeze dried celery
2 cup water

Add water to chicken, onion & celery.  Stir well and chill for 10 minutes. 
Mix 3/4 c mayo, 1 Tbsp dijon mustard, 3/4 tsp salt & 1/4 tsp pepper until well mixed.  Combine with chicken mixture, do not drain.  Chill in fridge for 1.5 hours till thickened.

Afternoon Snack:
GORP (trail mix) with added freeze dried blueberries & mangoes with Thrive Classic Lemonade

Dinner:
Southwest Chicken and Rice burritos & Thrive Fudge Brownies

TO MAKE:  Make the Thrive Express Southwest Style Chicken and Rice (simply add water and simmer for 15 minutes).  Scoop into tortillas and top with shredded cheddar cheese and salsa.

Now put up your feet and RELAX (perhaps with an extra brownie and glass of pinot noir)!

Bon Appetit,

Picture
1 Comment

Anyway Pasta Salad

8/24/2013

0 Comments

 
Picture
One of our favorite family musicians is Billy Jonas.  His song "Any Way You Go You're Gonna Get There" makes me think of all of my pasta salad success stories of late.

RANDOM?  Perhaps, but this is the way my brain works!

For this salad, you truly let your taste buds guide you.  Typically I NEED a recipe to follow, at least loosely.  But with a pasta salad, you simply need pasta, a sauce and then add-ons.  It can be different every time and it'll always be awesome!  When using Thrive ingredients, this healthy meal takes only the length of time needed to boil the pasta!  

ANY WAY YOU GO PASTA SALAD is my new "go to" easy meal.  Unfortunately for you, it's not an exact science... but it's going to end up delicious, that I can promise!

HOW TO:
  1. Start with your favorite pasta noodles, make at least 1.5 times the serving suggestions so that you have left overs!
  2. Choose your sauce.  The easiest (and tastiest) has been when we used Thrive Bechamel (alfredo) Sauce.  That sauce takes 2 minutes to whip up and provides the perfect creamy sauce for this hot or cold salad.
  3. PROTEIN?  Want to add some proteins?  We scooped in some Thrive chopped chicken.  Add this to your boiling pasta water during the last 5 minutes OR set in it's own bowl of room temperature water for about 20 minutes (that's what's reconstituting in the measuring up to the right).
  4. VEGGIES!  This is the fun part, if you have THRIVE in your pantry!  Choose your favorites and simply throw them into the boiling pasta water for the last minute before draining.  I've used:  corn, peas, onions, celery, broccoli, asparagus...
  5. Drain your masterpiece, mix in your sauce, add a little Thrive Chef's Choice Seasoning Blend (or salt and pepper if you haven't bought Chef's Choice yet... I promise you'll use it OFTEN!).  Top with Parmesean OR Feta cheese if desired (depending on what type of salad you're going for.  Pictured to the right is a "greek salad" I experimented with...YUM!

*If you want to use fresh ingredients, go for it!  Simply wash, chop and still add during the last minute or two of boiling pasta water to soften the veggies.

My mom made the pasta salad featured above and made SO much that the next day she took it to a friends' house, warmed it up, added more Bechamel and feasted.  That friend has since been enjoying the leftover leftovers as a cold salad for lunch...as have I!  Perfect for my first week back at school.  YUM!
Picture
Picture
Picture
Buy Thrive
Picture
0 Comments

Strawberry Pepper Granita

8/9/2013

0 Comments

 
Author's note:  This post was written last year and I, er, forgot to post it.  This year I missed strawberry season :(  Please be sure to "Pin" or bookmark this post and we'll compare notes next June!
Picture
We are lucky enough to live near a strawberry farm.  For the past few years, I haven’t picked my own... choosing to pay a little more for the pre-picked strawberries.  However, now that my girls are old enough to “help”, this year we picked our own!

YUM!  While the girls ate their weight in strawberries (sorry farmer!), I filled two HUGE baskets.  Overly ambitious?  Definitely!  However, I’ve always wanted to be a true farm girl, so I set out to make my first batch of strawberry jam, strawberry syrup, strawberry ice cream (the left scoop in the photo) & my new favorite:  STRAWBERRY PEPPER GRANITA.

I know what you’re thinking, “What does she mean pepper?”.  I mean GROUND BLACK PEPPER.  Weird, but DELICIOUS!  The flavors truly complement each other.  You may also be thinking “What is a granita?”.  

Granita is basically just a frozen, crushed dessert (think thick daiquiri).  In the August 2011 issue of MaryJanesFarm, Mary Jane shared a few granita recipes and I was so intrigued by the strawberry & pepper combo, that I ripped it out and saved it for the next strawberry season.  

Here’s the recipe as found in MaryJanesFarm:

Picture

Strawberry Pepper Granita

Ingredients
1 cup hot water
¾ cup sugar
2 T fresh lemon juice
½ t ground pepper
3 cups strawberries, sliced (substitute THRIVE sliced strawberries for a year-round fresh treat!)

Directions
In a small bowl, stir together water, sugar, lemon juice, and pepper until sugar dissovles.  In a food processor (I used immersion blender), blend strawberries until smooth.  Add sugar syrup and blend until combined.  Pour into an 8” square baking and freeze.  Stir and crush lumps with a fork every hour until evenly frozen, about 3 hours total.  Scrape with a fork to lighten texture, crushing any lumps.  Spoon into glasses or bowls and serve with a spoon.


Have you ever added an odd flavor to a dessert and discovered an amazing combo?


Bon Appetit,

Picture
Picture
Buy Thrive Strawberries
Picture
0 Comments

Backpackers' Classic Snack :: GORP

8/2/2013

0 Comments

 
Picture
Raise your cyber hand if you've ever eaten GORP by the fistful?  Many of my happiest (and oddly enough, sweatiest) moments have involved GORP:  endless card games on rainy days while camping with 10 youngsters as an adventure guide, hiking the high peaks of the Adirondack mountains with my college friends, scaling rock faces with my mate...

In fact, I have consumed inordinate amounts of GORP and was completely blown away the other day when I discovered that my kids had NEVER had it!  WHAT A FAILURE I AM :)

It was tons of fun surprising my kids and actually buying candy at the grocery store!  For our first batch, we stuck with the traditional recipe:  Raisins + Peanuts + M&Ms.  Hmmm, I suppose the true traditional recipe would just be raisins and peanuts, but that would seem sacrilegious!  Simply mix equal parts of your ingredients and hit the trail!


There is not specific recipe and you can let your creative juices flow!  Here are some of my favorite additions:
*note:  when mixing GORP, I prefer to mix small amounts at a time.  Depending on the humidity, peanuts may soften/ raisins may dry/ freeze dried food might loose it's crunch...
  • vanilla yogurt bites
  • craisins
  • freeze dried corn (tastes like candy!)
  • freeze dried blueberries/ raspberries/ apricots/ mango/ bananas (hello extra serving of fruit/vegetable!)


What's your favorite GORP combo?

Picture
0 Comments

A Family Secret Recipe ::  Orris Burgers

7/25/2013

6 Comments

 
Picture
It's been about 6 weeks since I lost my father and the pain is still breath catchingly shocking.  Just forcing myself to write those words brings the reality and finality crashing down on me as my eyes tear and my every fiber fights to change the subject.

One of my vows is to keep the memory of my father alive.  I want my children to know him though stories, laughter, projects, nature hikes, sky gazing, etc.  So, I keep him present through my language...AND with sharing his favorite things.


So today, for the first time EVER, I'm sharing his WORLD FAMOUS Orris Burger recipe.  Ok, that may be a tad grandiose, but friends from all over the world have eaten Dad's "mini meatloaf" burgers and LOVED them... so that's pretty darn close.  His burgers were always plump, juicy, oozing with flavor.

I about fell over the first time I visited a friend's house and her dad served flat pre-made frozen burgers.  BLAH!  These are simple and OH-SO-SATISFYING!

The other day we were in the mood for burgers, so I pulled out my father's recipe card and got to work.

Picture
To make these burgers correctly, you need to create them while wearing a mischievous grin and loudly slap the meat while making goofy eyed looks at all those grinning near you.  Try it... I bet you'll be unable to resist it forever in your future!

Of course, I simplified his recipe and used my THRIVE ingredients.  I'll provide the info for both ways, in case you're ambitious and like to chop your own veggies ;)

Picture
Orris Burgers
from John Orris' world famous, time-tested recipe

Ingredients:
  • 2 lbs lean ground meat
  • 2 med yellow onion or 2/3 c THRIVE fd onions
  • 2 green pepper or 1 c. THRIVE fd green or red peppers
  • 1/2 c sliced mushrooms or 1/2 c THRIVE fd mushrooms
  • 2 oz soy sauce
  • 2 eggs
  • 1 Tbs THRIVE beef bouillon
  • 1 c cereal (only if not using THRIVE, typically plain cheerios or rice crispies)

Directions:

  1. If using fresh vegetables:  sautee chopped onions, then add peppers & mushrooms till softened.
  2. Mix all ingredients well using your hands.
  3. Make 8-12 burgers (use that slap method!)
  4. Cook on grill over high heat, about 10 minutes per side.

*note:  the cereal catches the grease and is the key to these moist burgers.  However, when using THRIVE freeze dried produce, the dried veggies reconstitute by catching that grease.  It's really a match made in heaven!


Thanks Dad for the best burgers I ever ate!  I'll never match your skill, but heaven help me... I'm gonna keep practicing :)


Bon Appetit,

Picture
6 Comments

Campfire Cooking :: Brown Paper Bag Bacon & Eggs

7/22/2013

0 Comments

 
Picture
Whether you’re around your backyard fire circle or at a campground, breakfast is one of the most fun & easiest meals to make.  Now, we all know the basic ideas:  pancakes, eggs & sausage, french toast, etc...

But today I’m going to teach you how to WOW your friends and your taste buds!  You can make eggs and bacon, over a fire, in a BROWN PAPER BAG!

I read about this years ago and finally tried it.  It was so easy and fun.  Granted I did catch one bag on fire, but that was because I was being impatient and attempting to cook over flames.  Don’t do that and you’re golden :)

Materials:

  • Brown paper lunch bags (one per person)
  • 3 half slices of bacon for each person
  • 1 egg for each person
  • stick
  • hot coals

Ideally, you had a huge fire the night before and have some gorgeous coals simmering under a large log in the morning.  If that’s not the case, start a roaring fire first thing in the morning, within about 45 minutes, you should have some nice coals that you can use.  Here’s my easy tutorial on how to build a campfire.


Picture
Picture
Kid tested, mom approved!
How to:

  1. Chop your bacon in ½.

  2. Using one piece of bacon, rub the inside of the brown paper bag with the bacon.  Cover every surface of the bag until about ½ to ¾ up the sides of the bag.  This keeps the bag from burning!

  3. Layer about 3 pieces of bacon along the bottom of the bag.

  4. LIFT THE BAG OFF THE TABLE (I learned this the hard way... actually, my husband how to point it out to me as I was wallowing in self pity because all of the yokes were breaking).

  5. Crack the egg and gently slide it onto the bacon.

  6. Fold the top of the bag down 2 or 3 times.

  7. Punch below the fold with a stick.

  8. Hold it over hot coals.  This will take 10-20 minutes.  Once my coals were cool enough, I was able to sit the bag ON the coals...  however, this is how I burned one of my bags!

  9. When the egg looks done (the bacon might be slightly chewy, but it’s still delicious!), it’s time to eat!  Tear the sides off the bag and dig in!

Will you be trying this party trick campfire breakfast?

Picture
0 Comments
<<Previous
    Thrive LGM Sale Prices!

    Enter your email address:

    Delivered by FeedBurner

    Picture


    Lazy Green Mama

    Promote Your Page Too

    RSS Feed


    Categories

    All
    Birth
    Bravelets
    Cheap & Creative
    Cloth Diaper
    Etsy
    Fitness
    Food
    For The Baby
    For The Earth
    For The Home
    For The Kids
    For The Mama
    Get Outdoors
    Giveaway
    Life
    Medley Acres
    Oils & Herbs
    Preparedeness
    Shelf Reliance Sale
    Thrive Basics
    Thrive Dairy
    Thrive Fruit
    Thrive Grains
    Thrive Life Team
    Thrive Meals
    Thrive Proteins
    Thrive Vegetables

    Grab my Button!

    Lazy Green Mama

    Archives

    February 2015
    August 2014
    June 2014
    March 2014
    February 2014
    December 2013
    November 2013
    October 2013
    September 2013
    August 2013
    July 2013
    June 2013
    May 2013
    April 2013
    March 2013
    February 2013
    December 2012
    November 2012
    June 2012
    May 2012
    April 2012
    February 2012
    January 2011
    November 2010
    October 2010
    September 2010
    August 2010
    July 2010
    June 2010
    May 2010


    Header/Button designed by South of Sheridan

    Image Credits: IStock

    Share
Powered by Create your own unique website with customizable templates.